MoneyWorks Manual
Choices Lists
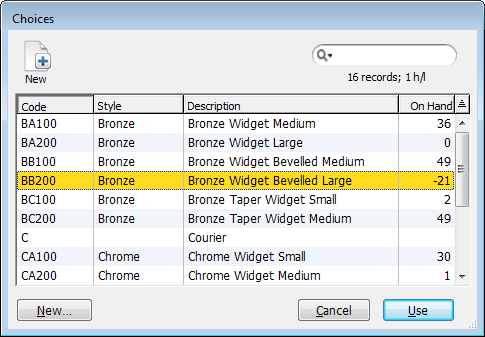
When you tab out of, or type an “@” into, a field that requires a code, a Choices Window will be displayed listing all valid codes for that field, subject to whatever filter is set for the list. You can select the code by double-clicking on it.
The Choices list is a normal MoneyWorks list, and can have its own filters and be sorted in the normal way by clicking on a column heading. You can also change the order of the columns and add and remove columns —see Customising Your List.
The Choices List is automatically displayed whenever you leave a field:
- into which you have entered an invalid code for an associated file
- which requires a code but is empty
Examples are the debtor code field when creating a debtor invoice, the product and account code fields in a transaction detail line, and the account fields in the product entry window.
If you know part of the code you are entering, you can type that into the field and then press tab. The choices list will be displayed with a code that starts with the same characters highlighted, making finding your code easier. If you type in part of the code and terminate it with “@” (the wildcard character), the Choices list will only display candidate records that start with the code you typed in (if there is only one match, this will be inserted automatically into the field).
Tip When the choices list is displayed, the item in the list that best matches what you have already keyed in will be highlighted. The match is done against whatever column the choices list is sorted by. If you sort by (for example) the account description, you will be able to key in the name of the account instead of the code.
When the Choices List is displayed you can select your choice by:
Double-clicking it Use the scroll bar to move through the list to find the item that you want and double-click that item. The list is a standard MoneyWorks list, so you can sort it by clicking on the column headings, or using the left and right arrow keys.
Using the Keyboard Type directly into the list to have the list automatically position itself (e.g. if you know that the code starts with “SA”, type “SA” to reposition the list on a record starting with “SA”).The up arrow and down arrow keys will move you through the list a line at a time, the home and end keys will take you to the top and bottom of the list respectively, while the page up and page down keys will move you through the list a screen at a time. Once the record you want is highlighted, click the Use button or press the keypad-enter key.
If you click Cancel or press esc, no code will be entered into the field.
You search the list by clicking the Find toolbar button (or press Ctrl-F/⌘-F)—this brings up the standard Find window. Only the records that match Find request will be displayed in the list. Press Ctrl-J/⌘-J (Find All) to display all the candidate records.
Accounts Choices List
The choices list for the Accounts file has two panels, the one on the left for the account itself and the one on the right for any departments within the account.
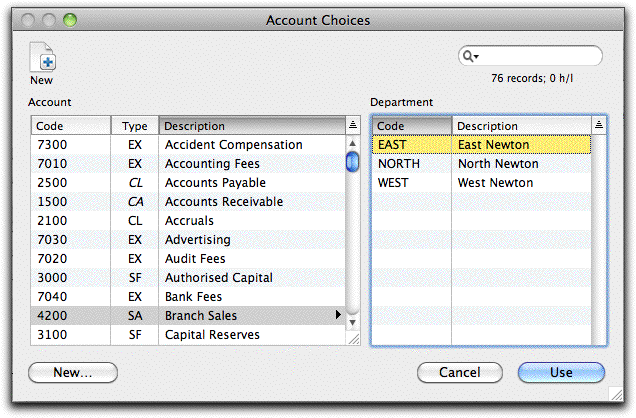
When a departmentalised account is selected in the left-hand list, the departments associated with the account are displayed in the right-hand list. Use the tab key to move the selection between the left and right lists, or simply double-click on the required department in the right-hand list.
Note: Accounts and Departments marked as Heading Only will be greyed out in the choices list and cannot be selected.
Choices and the Job Column
The job column field in transaction detail lines (if displayed) is optional. Tabbing through it will only bring up the choices list if the Job Code Required option is set for the associated general ledger code. If the option is not set, you can force the choices list to display by typing an “@”.