MoneyWorks Manual
Importing CSV files
OFX and QIF files have a defined structure and layout, which allows MoneyWorks to dissect them. CSV (comma delimited files) on the other hand has no set layout, but is just a set of field data separated by commas. MoneyWorks has no idea what each column actually represents.
The Generic CSV bank import option allows you to specify what data is in what column, and to save those settings for later reuse.
When you select Generic CSV, you will be prompted to locate the downloaded csv file in the normal manner, and then will be presented with the following CSV Settings window.
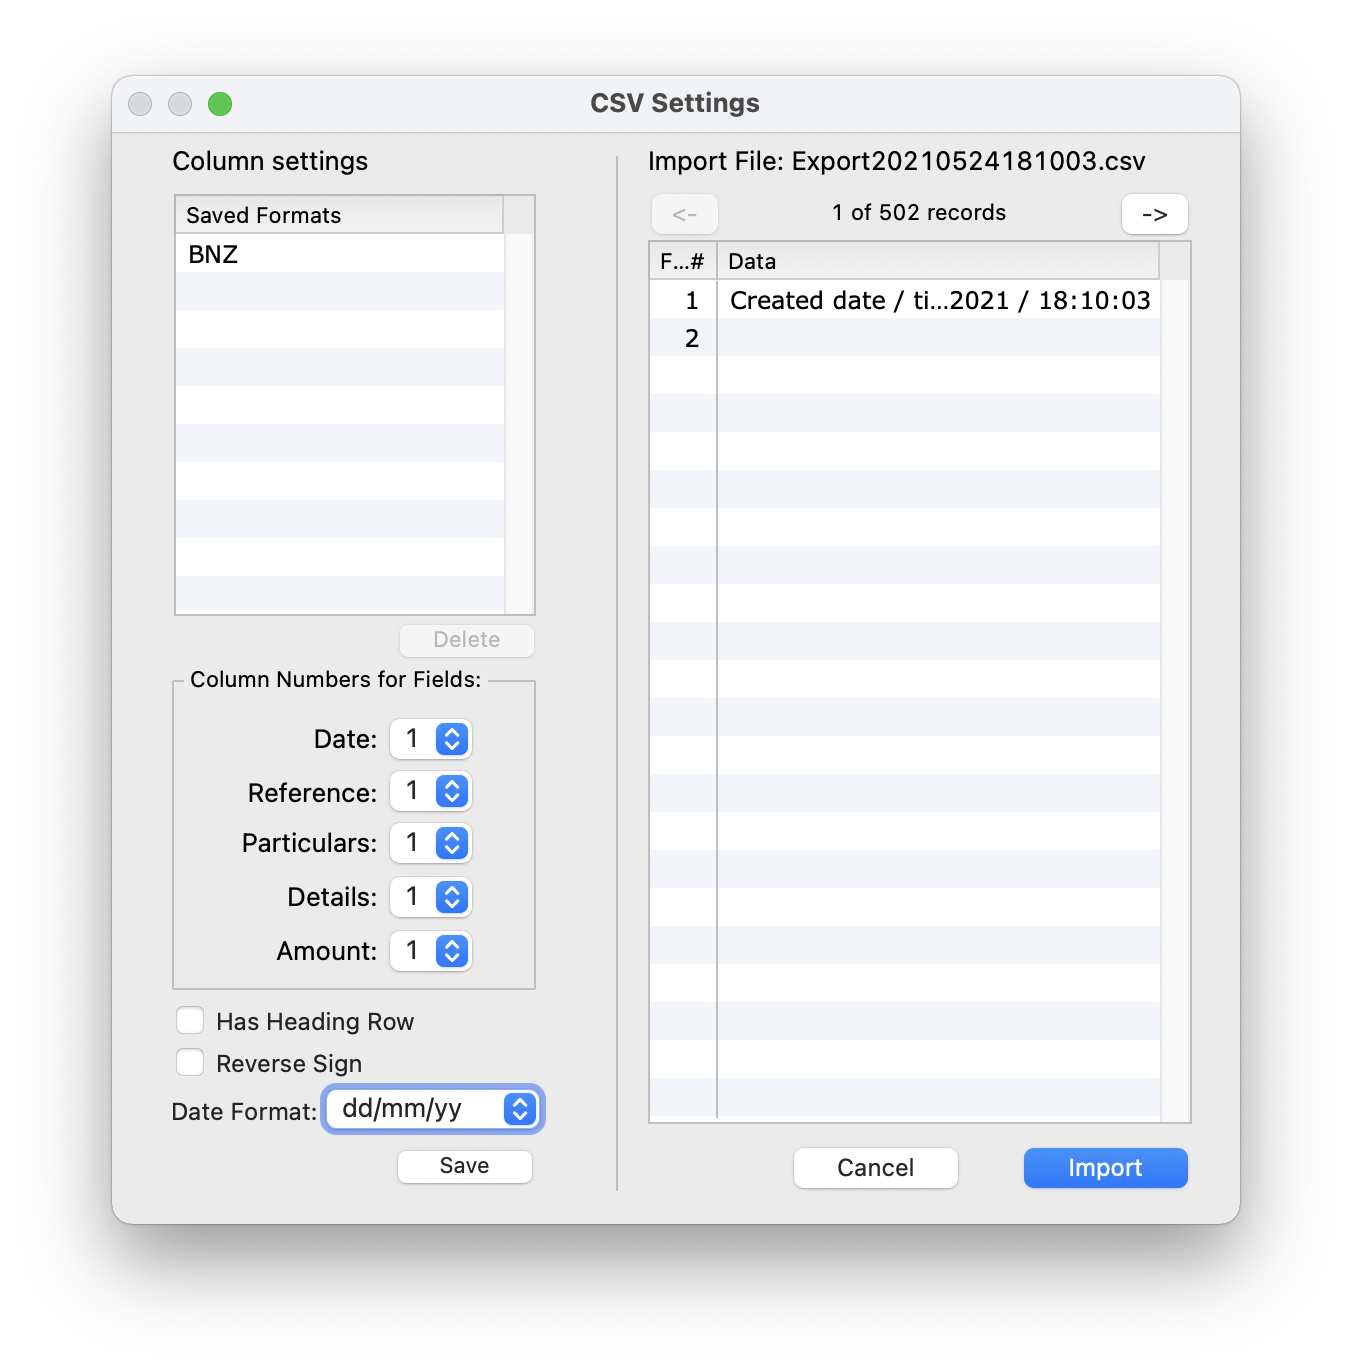
This is used to specify the columns in the csv file that is to be imported.
- Use the right and left arrow keys to step through the records in the csv file until you find the heading row or first data row
There can be a lot of cruft in bank csv files, and you need to step through this until you get to the transaction data.
- If there is a heading row, set the Has Heading Row checkbox
- Set the field pop-up menus (Date, Reference etc) to the column number that contains the associated data
In our sample file we have found a data record and can hence determine what columns the data is in.
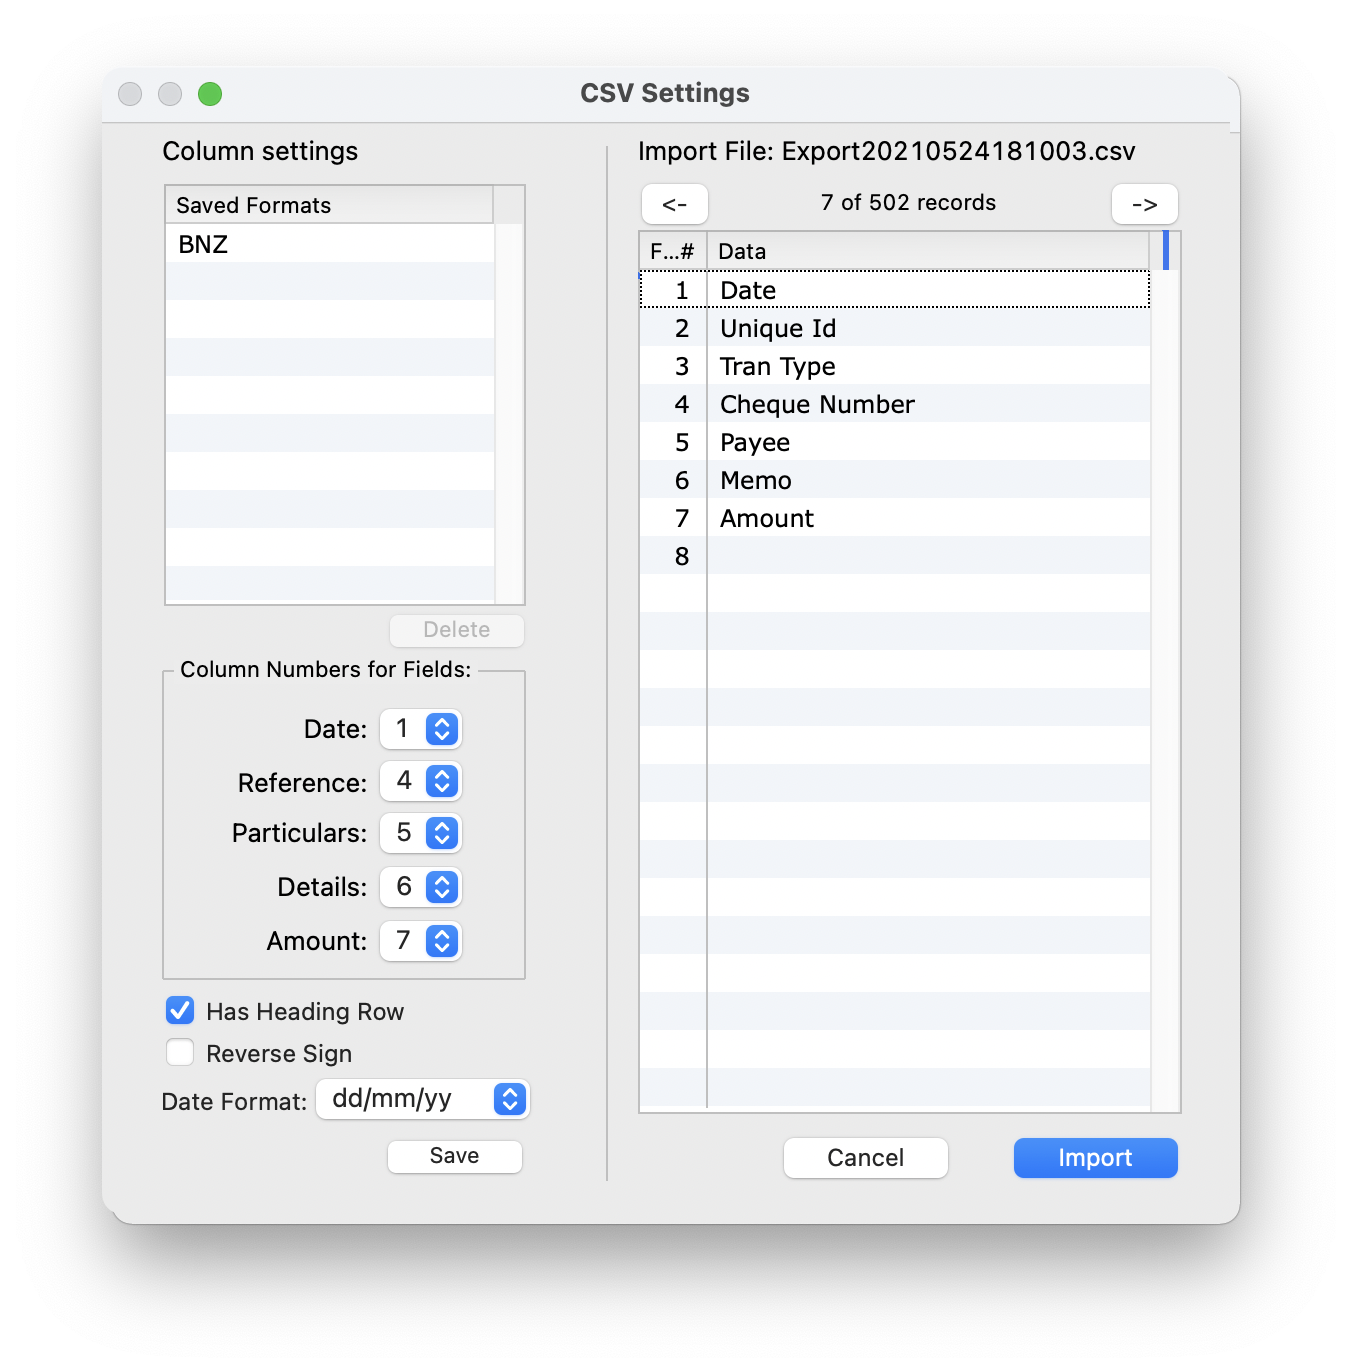
We therefore set the Date to column 1, the Reference to column 4 and so on.
- Check the date format on an actual data record
Dates are important in accounting, and have different formats depending on where you are and the whim of the bank.
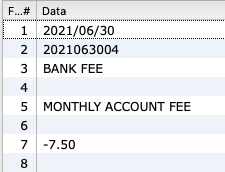
In this example the date is of the form yyyy/mm/dd, so we would set the date format pop-up to use that form.
Note: Don't worry about the date delimiter (it might be a slash, a dash or a dot), MoneyWorks will use whatever is in the actual data. The important thing is that it knows the order of the day, month and year.
Note: Some statements might have the sign of the transaction reversed (for example some credit card statements). In this case set the Reverse Sign option, otherwise your payments will appear as receipts.
Once you have the fields aligned, and the heading row and date options set correctly, click the Save button. You will be prompted for a name for the saved format.
- Click the Import button to import the csv file.
Important: As we have seen, bank csv files can contain more than just transaction data. The Generic CSV will skip any records which have fewer fields than the highest field number in the import settings. If the Has Heading Row option is on, the first eligible record is also skipped.
Note: Lines in the text file that are missing a date or an amount will be skipped (it appears that there are some really weird bank formats!).
Saved Formats
Previously saved formats are displayed in the top, left list. Just click the format to use, then click Import to load the data.
If you need to amend a saved format, click on it to select it, make the required changes, then click the Save button and save it with the same name (this will silently replace the existing one).
Highlight a format and click the Delete button to remove it.