MoneyWorks Manual
Payments History
The Payments History enquiry (not available in Cashbook) enables you to find information regarding invoices and payments (or receipts). Specifically:
- Find payments made on a nominated invoice
- Find invoices associated with a nominated payment (or receipt)
- Find invoices for a debtor or creditor
- Find payments to or receipts from a creditor or debtor
- Show a complete list of transactions for the debtor or creditor
To display the payments history window:
- Choose Enquiries>Payments History or press Ctrl-H/Shift-⌘-H
The Payments History enquiry window will be displayed.
When you type a reference number or code into the Payments History, MoneyWorks will check the Names file to see if the code is that of a valid debtor or creditor. If not, MoneyWorks will attempt to find an invoice whose number matches the code, and failing this, a cheque number that matches the code. If a match is made, the appropriate transactions are listed, with the newest ones at the top of the list.
You can help MoneyWorks locate the information if you set the Look up by pop-up menu to the type of item you are looking for (debtor code, creditor code, invoice number or receipt number).
- Type in the code of the name or the reference number of the transaction and press keypad-enter or click the “tick” button
The transactions that match the code that you specified will be displayed. The transaction type is displayed in the left hand column, where “DI” is a debtor invoice, “CI” is a creditor invoice, “CP” is a cash payment and “CR” is a cash receipt.
Any associated transactions, such as payments on an invoice, or the invoice relating to a cheque, are displayed under the transaction with their transaction type indented slightly.
You cannot sort or sum the items in this list.
Finding Payments made on a Debtor or Creditor Invoice
- Set the Look up by pop-up menu to Invoice Number
- Type the invoice number and press tab or keypad-enter
The invoice and any associated receipt/payments will be listed.
Finding Invoices Paid with a Particular Cheque
- Set the Look up by pop-up menu to Cheque or Receipt #
- Type in your cheque number and press tab or keypad-enter
If the cheque number uniquely identifies one transaction, it will appear at the top of the list followed by the invoices that it paid.
Finding Invoices or Payments for a Debtor (or Creditor)
- Set the Look up by pop-up menu to Debtor Code (or Creditor Code)
If you have already entered a reference number or code, and this is not a valid debtor (creditor) code, the Names choices box will be displayed.
- Type the debtor (or creditor) code and press tab or keypad-enter
The invoices and payments for the debtor /creditor will be listed.
Order of Display
You can choose to display by invoice, by payment, or as a simple list.
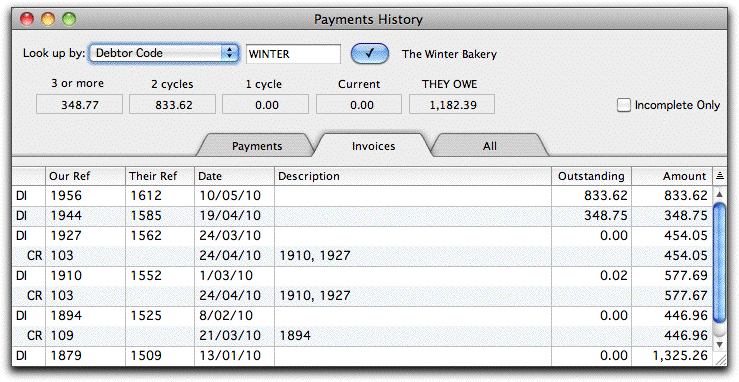
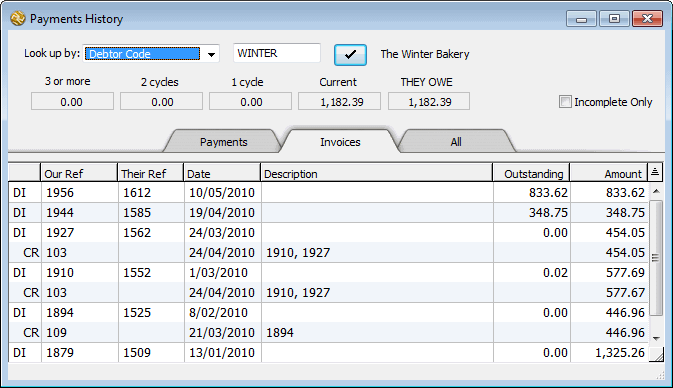
By Invoice: Select the Invoices tab to have all invoices for the debtor shown with the corresponding payments or receipts under each one, as shown above.
If you are looking for unpaid invoices you will need to use this view, since unpaid invoices do not show in the Payments view. Set the Incomplete Only check box, to have only unpaid (or partly paid) invoices displayed.
Note that payments made for more than one invoice will appear multiple times (once for each invoice).
By Payment: Select the Payments tab to have all payments made by the debtor shown with the associated invoices under each one.
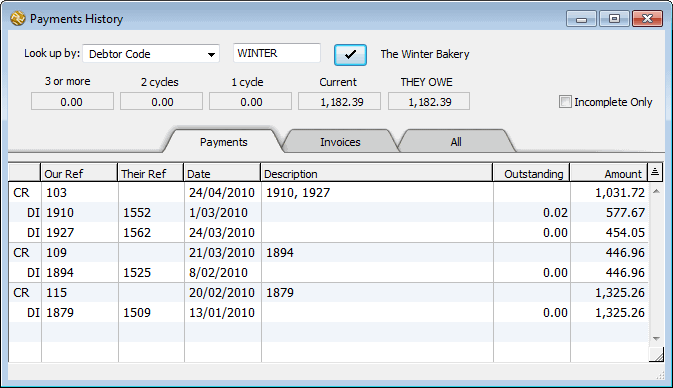
You must use by Payment to find overpayments as they do not show in the list by Invoice. In fact if you set the Incomplete Only check box, only overpayments for the debtor will be displayed.
Note that invoices that have been paid by more than one transaction will appear multiple times (once for each payment).
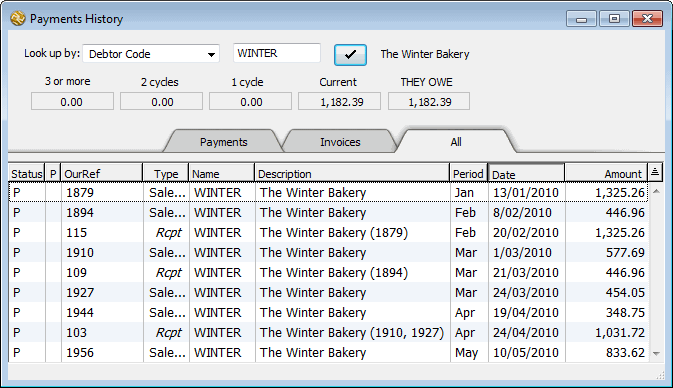
All transactions: Select the All tab to display all transactions related to the debtor/creditor as a simple list, which can be sorted and customised (additional columns displayed) in the normal manner.
Tip: If you want a report with a running balance of the outstanding amount for a debtor, use the Balance History from Date statement form. You can print this in the same manner as any other statement — see Printing and emailing Statements, but enter the start date into the Statement Date field.